February 21, 2008

MeMe !!

I've been tagged by Happy Home Baker, one of my favourite blogs to do a meme. As compared to the previous meme, this time, the topic is so general - Five facts about myself. This can be anything..so kinda difficult for me to come out with five facts to share with fellow bloggers about me. :) Ok I'll try my best ;)
  1. I must bake something at least once a week (unless really impossible) or at the very least 'create' something edible, if not my hands would get 'itchy' and feel really uncomfortable.
  2. I visit the Phoon Huat at the Sembawang MRT branch every now and then whenever I run out of baking supplies because it's near my home. I usually go there after work in the evening. So, you might just bump into me if you happen to be there!
  3. When I need to use the kitchen, I became the 'king' and my mum would refrain from cooking cos' there is simply not enough space as my kitchen is pathetically small. Thanks mummy for being so understanding. Hehe :P
  4. Two little dreams of mine - 1) To turn my hobby into something career-related, that I'd really love to do, though I've not had any concrete plans in mind yet. Right now, I just wish to concentrate in improving my skills, earn and save money first!
  5. 2) I wish to have my little (not physically) dream kitchen - Big enough, with the best, beautiful equipment, and lotsa cute baking utensils and bakewares, and ergonomically tailored for my baking/cooking needs. :)
Ok, here's the next meme steps to follow:
  1. Link to your tagger and post these rules.
  2. Share 5 facts about yourself.
  3. Tag 5 people at the end of your post and list their names (linking to them).
  4. Let them know they've been tagged by leaving a comment at their blogs.
Now, these are the following I would like to tag:

Happy Mrs Kwok - Viewfinder of Mr & Mrs Kwok
Anne - Simply Anne's
Elyn - e'sjoie
Small Small Baker

Bernice's Baking Journey

Happy Meme-ing!

February 16, 2008

Low fat Vanilla Yoghurt Cupcakes

I was sorting out my photos the other day when I saw this picture and realised that I'd forgotten to post this which I had intended to. I mentioned in my previous post that I'm in search for some good basic vanilla cupcake/muffin recipes. Having tried a few recipes, I find that different recipes can come in handy depending on the occasion I am baking it for, or the preference of the recipients, since most of the time, I don't bake solely for myself. Sometimes I like the richer, more buttery ones while at times I may just go for a lighter version and will go well with chocolate chips or nuts (previous post). Thus, it's good to have a few recipes suited to different taste buds. Some recipes called for milk, some buttermilk, yoghurt, sour cream...the list goes on. I have not tried out all but they do differ in taste and texture. I'll have to test one using sour cream one day.

This one that I am blogging about here uses yoghurt and lesser amount of butter. You can't really consider it's a healthier version as it still contains about 8g of butter fat per cupcake but as compared to most butter cupcakes, the content is considerably lesser. I like how the cake turned out soft, fluffy, with just the right amount of richness; neither too rich nor too light and dry. The texture is somewhere between a butter cake and a sponge cake, if you can see from the interior shots, though it was not taken that well. The top also rised nicely, with no obvious cracks. This one below is actually a mini sized cupcake. Doesn't it look cute? :P


If you had been blog hopping often, I believe the source of recipe ain't unfamiliar to you. It's from Alice Medrich's low fat chocolate marble cake recipe. I simply omitted the chocolate portion, and used only the yoghurt batter. The original chocolate marble cake recipe is a good one, I can assure. If you are interested, you may go to here.

Meanwhile, you may use this as a base for any basic vanilla cupcake recipe! I modified the recipe slightly though, as I halved the recipe and reduced the amount of sugar.

Ingredients:

1 cup cake flour
1/2 tsp baking powder
1/4 tsp baking soda
1/4 tsp salt
1/2 cup sugar
1 whole egg
3 tbsp unsalted butter (approx 45 g)
1/2 cup nonfat plain yoghurt
1 tsp vanilla extract

Method:
  1. Have all ingredients at room temperature. Preheat oven to 180°C.
  2. Use a wire whisk to combine all dry ingredients. Set aside.
  3. Whisk whole egg and set aside.
  4. Cut butter into pieces, beat for about 1 minute to soften. Gradually add remaining sugar and beat at high speed for about 3 minutes.
  5. Dribble eggs in slowly, about 1 tbsp at a time, beating constantly for 2 minutes.
  6. On medium-high speed, beat in half of the yoghurt. On low speed, beat in half of the flour;
  7. On high speed, beat in the rest of the yoghurt and vanilla.
  8. On low speed, beat in remaining flour.
  9. Scoop into lined muffin tins.
  10. Bake for about 15-20 minutes and a tester inserted comes out clean.
Recipe Source: Chocolate and the Art of Low-Fat Dessert by Alice Medrich

-------------------------------------------------------------------------------------------------

The muffin is actually made of egg white, flour and sugar only. It was intially intended to be baked as almond crisps. But somehow I lost court of the number of leftover egg whites I had, after all the CNY baking, which was probably the reason why I could not get my almond crisp correct. Thus, in order not to waste the remaining batter, I poured it into muffins liners and tada..! some simple muffins were born! LOL. The texture isn't that fabulous, but it ain't too bad either. Non fat, had the texture of a 'Huat Gao', and crunchy sliced almonds on top.

So, don't attempt to throw any unpromising raw materials; you'll never know what surprises it could turn into! ;)


Le Deli Potato!

Does this look familiar to you? If it is, then probably Delifrance had been successful; or I was successful in creating this potato dish. :P For those who are frequent patronisers of Delifrance, you would probably know that a few years back, Delifrance had this potato dish where the centre was stuffed with egg mayo, tuna mayo or seafood mayo, the usual fillings in their sandwiches. I remembered that time, I went for this several times at Delifrance. I really love this dish because I like potatoes. I don't think Delifrance now has it cos' I don't see this in the menu...I wonder why. Probably it's not that popular i guess :)

Anyway, not sure either how I suddenly have this thought of replicating this myself. Made this for my lunch and thought this was really simple. Baked the potato, scope some flesh out from the centre to make a 'well', and fill it with your favourite fillings. Top it with bacon chips and some dash of pepper..and there you are! I would suggest not to boil the potato as it would be wet and moist and won't taste as good. Baking it also makes it easier to remove the skin. For a medium potato, I took about 25 minutes. Not sure of the exact time needed, cos' I need to constantly check for its softness.
If you like potatoes, give it a try! :)

February 6, 2008

More Chinese New Year goodies

Alritey...here are the other goodies that I made.

Cashew Nut Cookies

The recipe for this cookie was copied from one of the recipe books (I forgot the title of the book) while I was browsing at MPH bookstore. Hehe...I type out the recipe briefly in my mobile phone and there you are!

Ingredients:

250 g butter
180 g icing sugar
400 g plain flour
1 tsp baking powder
180 g ground cashew nuts
1 egg yolk
1 tsp vanilla essence
whole cashew nuts, to decorate

Method:

  1. Preheat oven to 180°C.
  2. Put cashew nuts in a blender and blend until fine (take note that once it's just fine, stop the blender immediately. If you continue, you will get a paste like mine! ). Set aside.
  3. Sift flour and baking powder. Add grounded cashew into the flour mixture.
  4. Cream butter and icing sugar until light. Add egg yolk, vanilla and continue to cream.
  5. Add in the flour mixture and mix until a dough is formed.
  6. Use a cookie cutter of your desired shape and cut out the cookie.
  7. Decorate with whole cashew nuts.
  8. Place on a baking sheet, bake for about 10-15 minutes or until brown.

The cookie is crispy and has a nice cashew nut fragance. This recipe can yield about 100 cookies.

Chinese Peanut Cookies

This recipe was from Florence's blog again. There were many good reviews on this recipe and I personally tried it last year. The cookie was very fragnant with lots of peanuts and it melts in mouth. But I forgot to egg wash the cookie before sending into the oven, which could be the reason why the cookie was too crumbly and fell apart?

Spring Roll Cracker


The first time I'd eaten this type of spring roll cracker was when my mum bought it from Malaysia and I bought it again while I went there for holiday with my company trip last year. It's very crispy and addictive. I was surprise that it is so easy to make when I came across this recipe in Florence's blog.


All you need to do is to buy a packet of spring roll skin, roll it with the help of a chopstick, and cut it into pieces, and deep fry. After letting it cool down and oil absorbed, in icing sugar.

I didnt make this myself as I don't like to deep fry things. So credit goes to my mum! We can easily make a whole big tin!


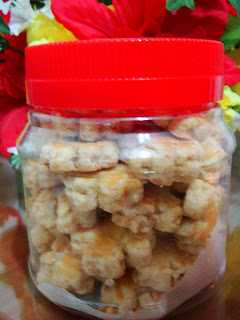
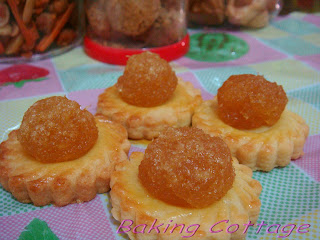
I know I'm late in posting the recipes but still not too late to wish everyone a very Happy and Prosperous New Year!

新年快乐,心想事成!

February 5, 2008

Finally...my oven gets some rest

After my massive CNY baking, I finally get to give myself and my oven a break. In terms of variety, I actually didn't get to bake more than last year. New goodies that I tried out this year was cashew nut cookies. Sadly I didnt get to bake others in my list such as kueh bangkit, green pea cookies and cornflake cookies.

Nevertheless I'm happy that this year I did something I'd never thought I would do...Yes, I did a little bit of 'venture'....I sold my bakes! :D

Well...this decision came about when I brought over some cookies during x'mas last year as little gifts for the kids. My aunties suggested that I made some cookies during chinese new year and they would support me. Since there were only five orders that time, I decided to go ahead with it. My intention was not so much of earning extra income, but more of gaining some 'experience'. My buddies knew about it and supported me too! I decided on almond cookies since I had success with it last year. I did a trial batch before the actual baking to calculate the amount of ingredients needed.


Woo..I must say this was indeed an experience for me. Even though the method itself is pretty easy, but having to bake huge batches is not! Imagine mixing 1 kg of flour with the almonds, melted butter and oil at one go is no easy task for me. The mixing bowl was full to the brim and I had to mix for a long time before getting all the ingredients mixed to form a dough; not to mention using the cookie cutter to cut out the shapes one by one. I finished in 2 days, half day each. I was really exhausted after that; my neck was stiff after having to bend my head to mould out each cook with the cookie cutter.

Well...I'm still glad that I had done it cos' all the hard work was worth it. My friends and aunties commented that the cookies were nice! I guess probably it's due to the generous amount of almonds used. :)

I used the recipe from Florence's blog. I followed the exact recipe except that I omitted the almond powder which I guess will impart the almond flavour, which I do not like. I used 2 tbsp of ground almond instead, but not sure whether that would make any difference to the taste and texture, probably more powdery. I also increased the amount of oil. This recipe is very good and I would say it's one of the nicest almond cookies that I've tried. Heehee...Of course I know there are good ones around sold outside, but taste wise, I prefer mine. :)

Do take note you may need to add more oil in order to the dough. For me, I used the same amount of melted butter and 8 tbsp canola oil based on the recipe. You should follow the recipe and then add bit by bit (teaspoonful) until you can get a dough that is not too dry. The dough is rather crumbly so prepare a bit of oil and when dough gets too dry, you may add a little more.

Next in my list are the pineapple tarts. I made two types, the open-tart version and the pillow-style version. For the open tart version, I used the recipe from Aunty Yochana's lattice pineapple tarts. The pastry was soft and buttery and I liked it.

For the pillow-style version, recipe was adapted from here. This yielded a melt-in-your mouth tart that's not too sweet. Overall, I'm pleased with both recipes. I didn't make my own pineapple jam though as I have too little time. Hopefully next time, I would try to make the jam myself.


More new year goodies coming up...;)